By:
Category:
Comments Off

Memory Upgrade


I decided to spend $40 and add 4 GB more ram to my Linux server that acts as my VMWare
host on my home network. The machine now has 8gb of RAM and is running Ubuntu 8.10
64bit server.


Top stats before the upgrade with just 4gb:


Top stats after the upgrade with 8gb:


Here is what the Guests look like memory wise
about 20 minutes after the reboot:


It appears that Linux is really building up the cached memory after adding the extra
sticks to the motherboard. It will be interesting to watch this over time.


VMWare server 2 thinks that it is only consuming about 1gb of RAM but the stats from
TOP look misleading at the first glance. It looks like about 1gb of App
space + about 4gb of Cache for a total of 5gb in use.


By:
Category:
Comments Off

XP, Windows, and Mac


My remaining reasons for maintaining some XP machines at home is diminishing very
quickly. Video Editing, Photo/Image Editing and a couple of HAM radio programs are
the last items that I have not been able to move/port over to Linux. My kids have
a couple of games that they like but I could move them to the Mac as those titles
are available there as well.


2009 might be the year that we phase out the last of the Windows world here at our
home.


I would like to move to the Mac but the price tag is frankly too much for me to make
the jump at this point given that it is really just commodity Intel hardware.


I like Linux but the Video and Photo/Image Editing software is not at the same level
as the Windows or Mac platforms.


I am so close...  but I need to bridge these last couple of gaps.


By:
Category:
Comments Off

Ubuntu 8.10 + VMWare server - Patch Scare


I decided to patch my Ubuntu server this morning. This server also is my VMWare host
for about 7 virtual machines running on my network. Running the upgrade was not a
big deal as the Ubuntu updater is pretty solid. My fear started when it asked to reboot
the system which made me a bit nervous as it could mean a kernel update.


I rebooted only to discover that my VMWare host was no longer starting the VMWare
server bit.


(Insert horror music here.)


Initially I thought that maybe it the VMWare bits were not set to auto-boot... but
I found several hits while searching that pointed here:


http://www.novell.com/communities/node/6798/allow-vmware-server-correctly-load-after-reboot-without-having-run-vmware-configpl-every-t


So I updated /etc/init.d/vmware with the notes. No luck. 


I then started hunting thru the logs without any obvious errors showing up.


Next I figured out the commands to manually start/restart the VMWare bits and final
got an error that I could use: Module vmnet is not loaded.  


After some unsuccessful searching I decide to rerun the config script. I was suspecting
that I probably got a minor kernel upgrade and that was the root of the problem.


sudo ./usr/bin/vmware-config.pl


That was the magic. Rerun the wizard and all is well. I then rebooted the system again
to validate that the guests would restart shortly after the host restarted.


By:
Category:
Comments Off

Enabling an FTP server on Ubuntu 8.10


I am working on setting up a system so that I can create backup images of all of my
PCs to my Linux server. (I will eventually off-site all of my data on a USB drive
that I will store at the Bank in safety deposit box)


Install:

sudo apt-get install vsftpd


Backup the config file to your homedir

sudo cp /etc/vsftpd.conf ~


Edit the config file:

sudo nano /etc/vsftpd.conf


Change the config to:

anonymous_enable=NO


local_enable=YES


restart the service:

sudo /etc/init.d/vsftpd restart


By:
Category: ,
Comments Off

GeoCaching notifications on your TomTom One


It is nice to get notifications when you driving near some geocaches with the kids
in the car while running errands. Here are the steps for setting up the notifications.


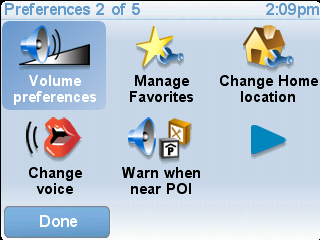
Go into the preferences and select "Warn when near POI"


Select your category.


I see mine to notify me of them if we are within 5 miles.


Choose a sound.


Yes


I chose no... I want it warn all the time.


You are done.


By:
Category: ,
Comments Off

Geocaching with a TomTom One


Here are some simple notes on how to download GeoCache locations into your TomTom
One 3rd Edition. It took me about an hour to figure this out the first time. It is
similar for other platforms.


I upgrade my account at www.geocaching.com free
a Free account to a Premium account. This makes easier to run large queries for
sites. You can use the free account but the number of sites that you download in a
single run is smaller, you will only be able to use the *.loc format, you can't setup
pocket queries, our trips. (Spend the $30... it is well worth the money for the features.)


The free search will give you something like the picture below. Select which caches
you want and click "Download Waypoints" and you will be prompted to save a *.loc file.
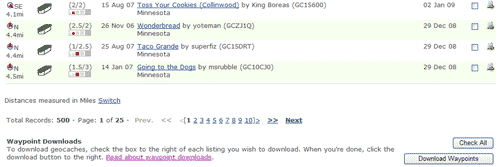


If you have a Premium account you can build a Pocket Query and then select when you
want it to run. I a couple of minutes later you will get an email. The picture below
was my first query.


I then went to:


http://www.gpsvisualizer.com/gpsbabel/gpsbabel_convert?all_types=1&intype=gpx&outtype=tomtom&type=w&zip_output=0


That link will set it up for GPX and TomTom file formats. It will also support the
*.loc format if yo choose that from the menu.


FYI... The TomTom One uses a *.ov2 format

Browse to your source file that you saved or got via email.


Click "Convert the file"


Once the processing is done the web page will refresh and you will get a link to down
load your file. Go ahead and download the file and save it someplace where you will
not lose it.


I renamed the file that we just downloaded to: GeoCaching.bmp


I then created a 22x22 8bit bitmap image for the icon that will show up on the map.
I saved it as GeoCaching.bmp.  (Right
click on this bmp and save it.)


These two files need to have the same name with their respective file extension. I
put both files into a new directory on my local pc. Your mileage may vary.


I then connected my GPS to my laptop/pc via the USB cable. You will be able to browse
the directories just like a USB hard drive or thumb drive. In my case the GPS shows
up as my I:\ drive. Browse to I:\USA_and_Canada. You will now copy the two files GeoCaching.ov2
and GeoCaching.bmp into this map directory.
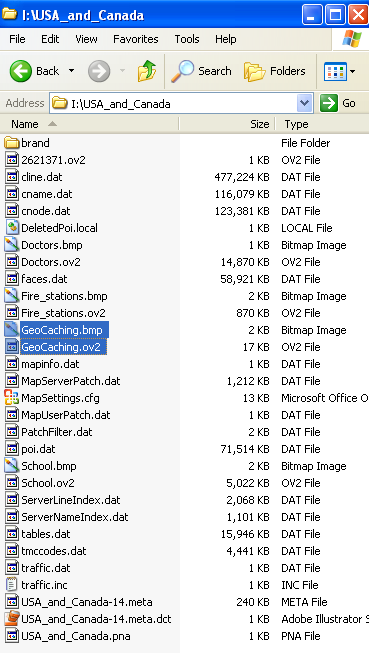


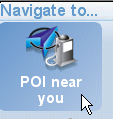
Disconnect the USB cable from the GPS and you should now be able to browse GeoCaches
as POI. The pictures below summarize browsing to a GeoCache POI assuming that
you understand the basics of the TomTom menus.
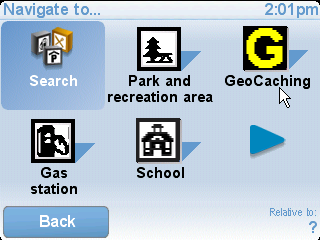
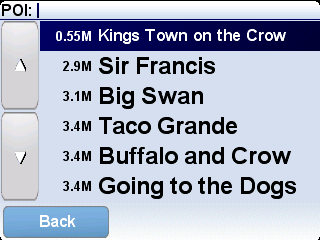
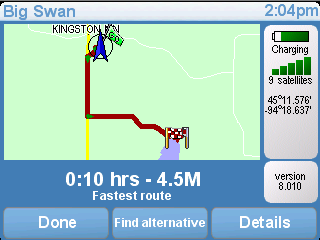


The TomTom runs Linux and appears to be a very hackable little device. These instructions
might make this look like a big process which is not really the case. Once you have
done it once you can actually do the whole process in about 5-10 minutes.


By:
Category: ,
Comments Off

TomTom One GPS is running Linux


While doing some research on my TomTom One 3rd Edition and GeoCaching I discovered
the my little device is running Linux and appears to be very hackable. (Not that I
have anything that I really need to change on it)


http://www.opentom.org/Main_Page


http://www.opentom.org/TomTom_ONE_3rd_Edition


http://www.opentom.org/TTconsole


http://www.opentom.org/BTconsole


How to change the voice files:

http://stefans.datenbruch.de/tomtom/


Hacking the TomTom ONE through Open Source


http://www.itwire.com/content/view/13531/53/


TomTom Linux Project

http://www.slashgear.com/tomtom-linux-project-303219/


By:
Category:
Comments Off

Installing JBoss 4.0.5 on Ubuntu Server 8.10


We are doing some work with JBoss at work. It got me wondering about how to install
this and play with it at home on one of my Linux server VMs.


Here are the basic steps that I ran tonight.


Get a JDK


sudo apt-get install sun-java6-JDK


Download a JBoss install


wget "
http://internap.dl.sourceforge.net/sourceforge/jboss/jems-installer-1.2.0.GA.jar"


Make a place to store the install bits


sudo mkdir /home/jboss


Install the bits


java -jar jems-installer-1.2.0.GA.jar -installGroup default installpath=/home/jboss


Set the environment variables


sudo nano /etc/profile


JAVA_HOME="/usr/lib/jvm/java-6-sun-1.6.0.10

export"export JDK_HOME="${java_home}"

export PATH="${JAVA_HOME}/bin:${PATH}"


logout then back into pick up the path.


Manually start JBoss

cd /home/jboss/bin

sudo ./run.sh


Test the


http://server:8080


Default User

user: admin

pass: admin


Some of the places that I found notes on how to do this:


http://it.megocollector.com/?p=912


http://space.uwants.com/html/47/110947-188759.html


http://www.jboss.org/jbossas/docs/index.html


http://docs.jboss.org/jbossas/guides/installguide/r1/en/html/install.html


I have two minor issues to work out here:


1. The Java_Home info is not quite correct.

2. I think that I need to change the permissions on the /home/jboss directory so that
I can run this without using sudo. Not a big deal as I have only
been working on this for a few minutes.


By:
Category:
Comments Off

Installing VMWare Tools on Fedora Core 10


I have been struggling to get VMWare Tools to properly install on Fedora Core 10 for
a few weeks. My initial searches had left me with little in the way of resolution.
I then found some excellent (link at the end of the posting)  notes that put
me on the right path.


Become SU


yum install make gcc kernel-devel


Say Yes to the prompt


uname -r


rpm -q kernel-devel


Compare the output of uname and the RPM info... if they don't match then run the YUM
upgrade step (next)


yum -y upgrade kernel kernel-devel


The next step is needed or your xwindows config may not work.

nano /etc/X11.xorg.conf


Section "Monitor"

Identifier "vmware"

EndSection


Save it (write out... then exit)


Now run the VMWare Tools install from the command line.


Excellent notes found at:

http://www.dedoimedo.com/computers/fedora-4.html


By:
Category:
Comments Off

Linux Patches and Upgrades


Here is a screen capture of a Ubuntu 8.10 VM and Fedora Core 10 VM running side by
as they download and install the latest updates after the initial installation.


Fedora Core 10 Workstation (left)               
Ubuntu 8.10 Workstation (right)


Initially I like the look of Ubuntu a bit more than Fedora. On the flip side a large
amount of the Linux world writes for RedHat/Fedora Core based systems with their RPM
format.


The Debian world does not seem to be as large. I still seem to manage to be pretty
successful with Ubuntu as there is a lot of great documentation resources on the web.