Starting Arduino with Ubuntu
I decided that I would spend a little time today getting to know my Arduino Uno development board.
I have worked with PIC processors in the past and have several prototyping and programming boards for that platform but I have never worked with the ATMEL AVR or Arduino platforms. "Naked AVR" and Arduino are both very popular with a lot of tutorials on the Internet. I had ordered an Arduino Uno board much earlier in the year but had not done anything with it until today.
I am running Ubuntu 11.10 in my office and radio room and 11.04 at my electrical workbench. To install the Arduino development environment you can go to the Linux Software Center (add/remove program equivalent for the windows folks out there) and search for Arduino. There is a fairly current version of the tools in the repository and click install.

I plugged in my USB cable from the PC to the Arduino but you will need to know what USB port it was assigned. So ran the command dmesg | tail -2 which gives me the last 2 lines of the "display message" or "drive message" info for when I connected the Arduino. On my system it came up as ttyACM0
watch "dmesg |tail -15" --would work well for this too

I fired up the development tools, saved a new blank sketch called sketch_blink and then grab the blink example and copy/paste the code into my sketch. I then used the upload tool to send the code to ttyACM0

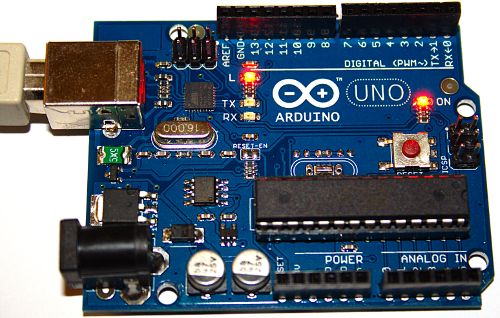
Here is a picture of my Arduino with the LED on pin13 blinking. (Your basic hello world kind of program)
While this is not very exciting it did validate that my Linux workstation running Ubuntu 11.10 64bit could talk to my Arduino Uno board and upload a program to it. The whole time end-to-end was less than 10 minutes for all of the things that I listed above... that was my first time trying this. (aka: pretty simple)
This is much easier than my last experience working with the PIC platform and Ubuntu.
I will be spending some time reading the large amount of examples & tutorials on the internet so that I can get up to speed on the platform, keywords, and working with the "C" development environment. I have some project that are in need of a MCU for control and feedback.
Once I have the basics under control I will probably look at the AVR-GCC toolchain. I think that it can be installed via: sudo apt-get install gcc-avr binutils-avr gdb-avr avr-libc avrdude
73 de NG0R

I have worked with PIC processors in the past and have several prototyping and programming boards for that platform but I have never worked with the ATMEL AVR or Arduino platforms. "Naked AVR" and Arduino are both very popular with a lot of tutorials on the Internet. I had ordered an Arduino Uno board much earlier in the year but had not done anything with it until today.
I am running Ubuntu 11.10 in my office and radio room and 11.04 at my electrical workbench. To install the Arduino development environment you can go to the Linux Software Center (add/remove program equivalent for the windows folks out there) and search for Arduino. There is a fairly current version of the tools in the repository and click install.
I plugged in my USB cable from the PC to the Arduino but you will need to know what USB port it was assigned. So ran the command dmesg | tail -2 which gives me the last 2 lines of the "display message" or "drive message" info for when I connected the Arduino. On my system it came up as ttyACM0
watch "dmesg |tail -15" --would work well for this too
I fired up the development tools, saved a new blank sketch called sketch_blink and then grab the blink example and copy/paste the code into my sketch. I then used the upload tool to send the code to ttyACM0
Here is a picture of my Arduino with the LED on pin13 blinking. (Your basic hello world kind of program)
While this is not very exciting it did validate that my Linux workstation running Ubuntu 11.10 64bit could talk to my Arduino Uno board and upload a program to it. The whole time end-to-end was less than 10 minutes for all of the things that I listed above... that was my first time trying this. (aka: pretty simple)
This is much easier than my last experience working with the PIC platform and Ubuntu.
I will be spending some time reading the large amount of examples & tutorials on the internet so that I can get up to speed on the platform, keywords, and working with the "C" development environment. I have some project that are in need of a MCU for control and feedback.
Once I have the basics under control I will probably look at the AVR-GCC toolchain. I think that it can be installed via: sudo apt-get install gcc-avr binutils-avr gdb-avr avr-libc avrdude
73 de NG0R